Connect an Azure DevOps repository
This guide will walk you through connecting your Azure DevOps repositories to MFE Orchestrator.
Prerequisites
- An active Azure DevOps account
- Access to at least one organization and project
- Admin permissions to create Personal Access Tokens
Step 1: Navigate to Code Repositories
- Go to Code Repositories in MFE Orchestrator
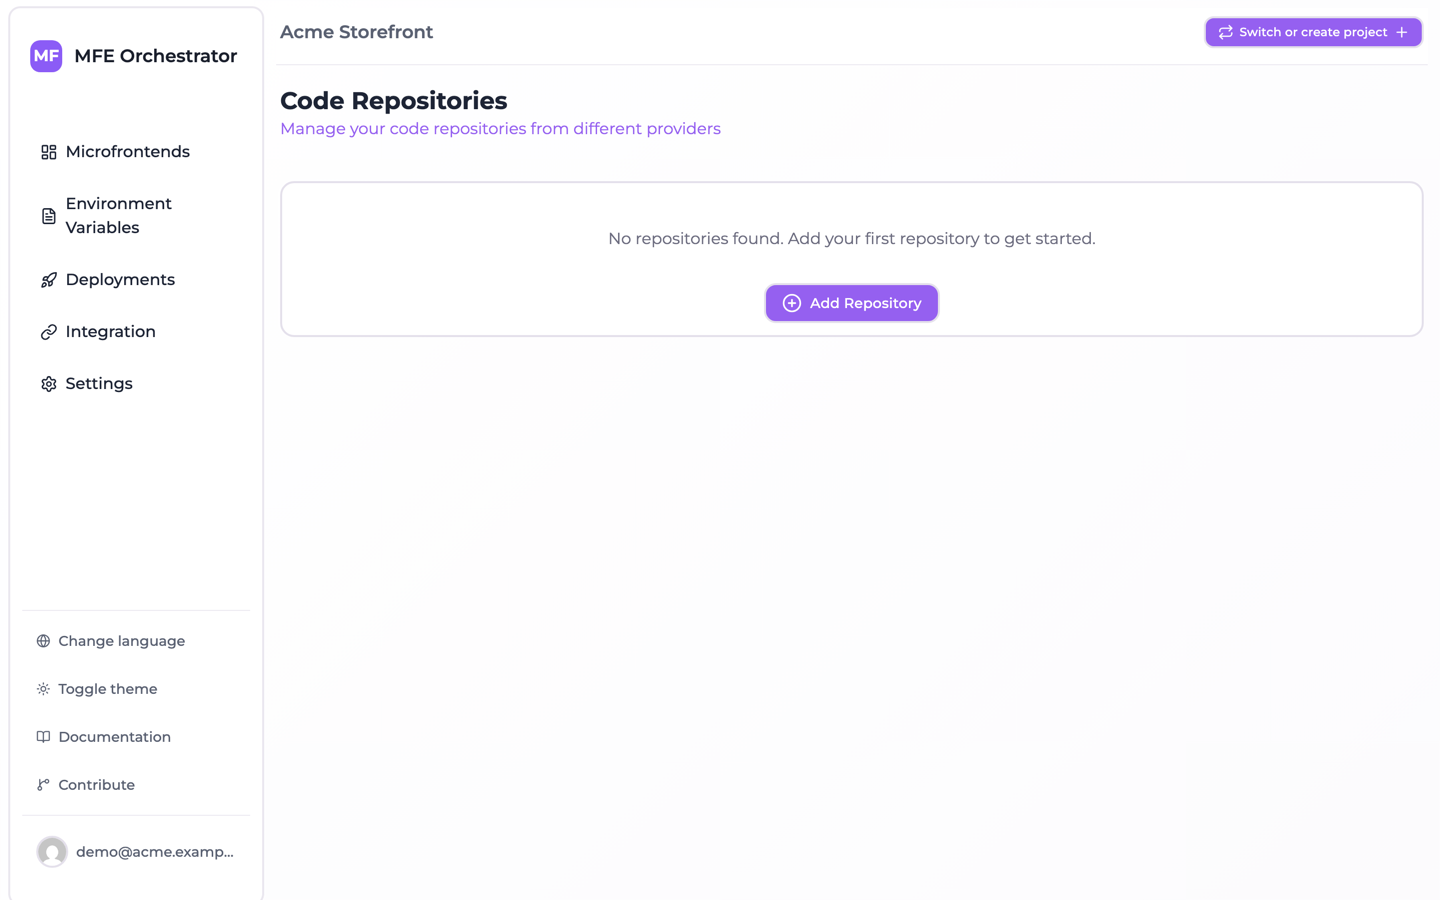
- Click the Add Repository button
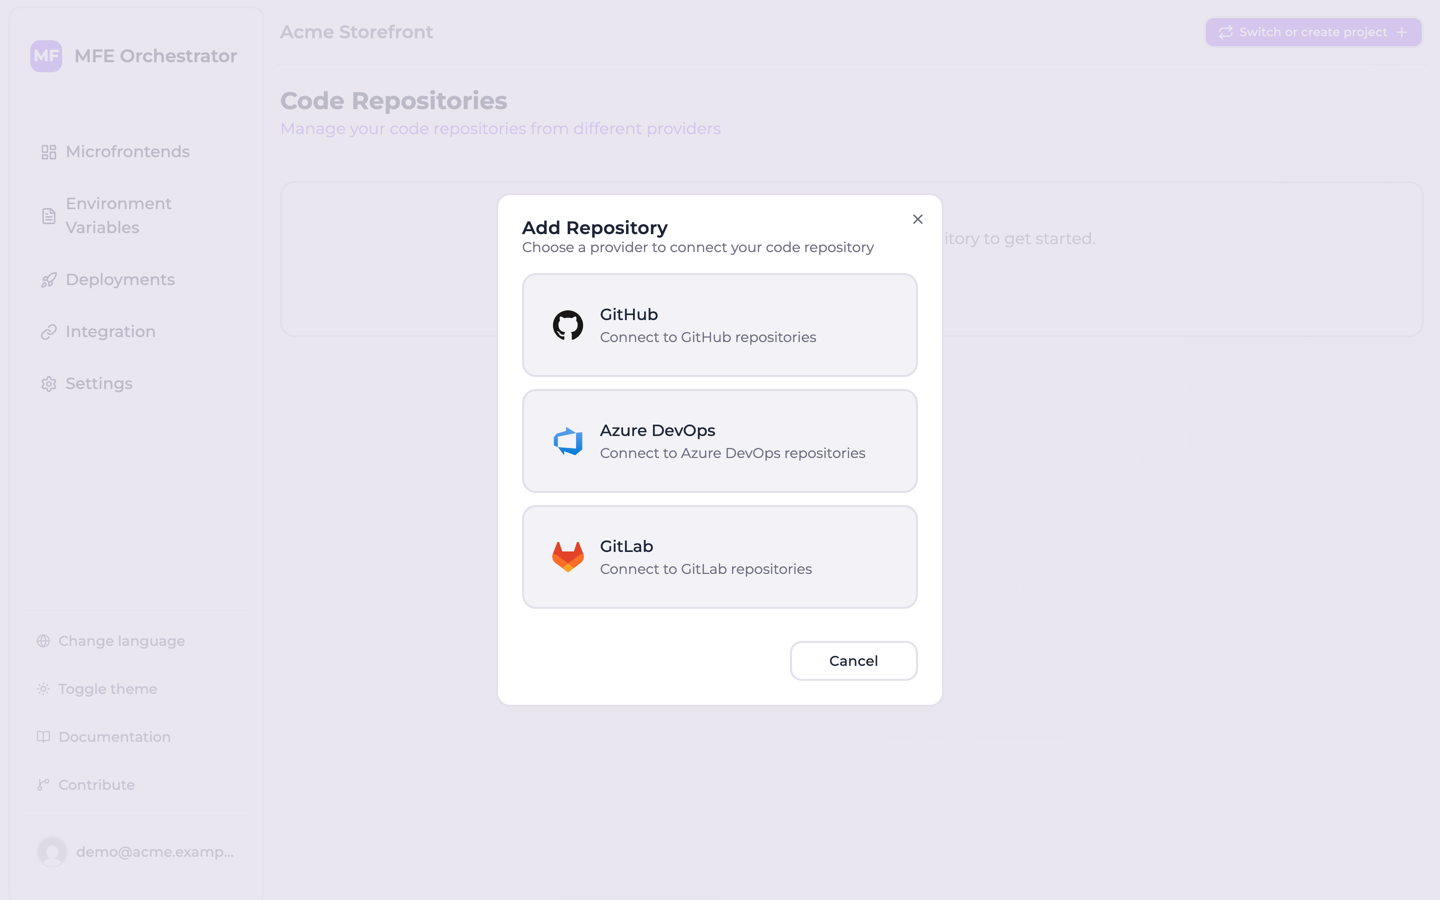
- Select Azure DevOps as your provider
Step 2: Create a Personal Access Token (PAT)
A Personal Access Token is required to authenticate MFE Orchestrator with your Azure DevOps account.
2.1 Access Token Settings
- Go to your Azure DevOps organization at
https://dev.azure.com/{your-organization} - Click on your User Settings icon (top right corner)
- Select Personal Access Tokens
- Click + New Token
2.2 Configure Token Settings
Fill in the token configuration:
- Name: Enter a descriptive name (e.g., "MFE Orchestrator")
- Organization: Select the organization(s) you want to connect
- You can select All accessible organizations if you have multiple organizations
- Expiration: Set an expiration date
- Recommended: 90 days or custom date
- For security, avoid selecting "Full access" indefinitely
2.3 Required Token Scopes
:::warning Critical: Select the Correct Scopes Make sure to select these exact scopes for MFE Orchestrator to function properly: :::
In the Scopes section of the token creation dialog, configure the following permissions:
1. Configure Code Scope
- Find the Code section in the scopes list
- Click on the dropdown next to Code
- Select Read, write & manage
This grants access to read source code, commits, and branches - required for fetching repository content and managing deployments
2. Configure Build Scope
- Scroll down to find the Build section
- Click on the dropdown next to Build
- Select Read, write & manage
This grants access to build pipelines and build results - required for triggering builds and monitoring build status
3. Configure Release Scope
- Continue scrolling to find the Release section
- Click on the dropdown next to Release
- Select Read, write & manage
This grants access to release pipelines and deployment information - required for managing releases and deployment workflows
4. Configure Variable Groups Scope
- Find the Variable Groups section in the scopes list
- Select Read, create, & manage
This lets MFE Orchestrator create the
MFE_ORCHESTRATOR_SECRETSvariable group where the API key its pipeline uses is stored
:::tip Quick Check After selecting all scopes, verify that you have:
- Code: Read, write & manage
- Build: Read, write & manage
- Release: Read, write & manage
- Variable Groups: Read, create, & manage
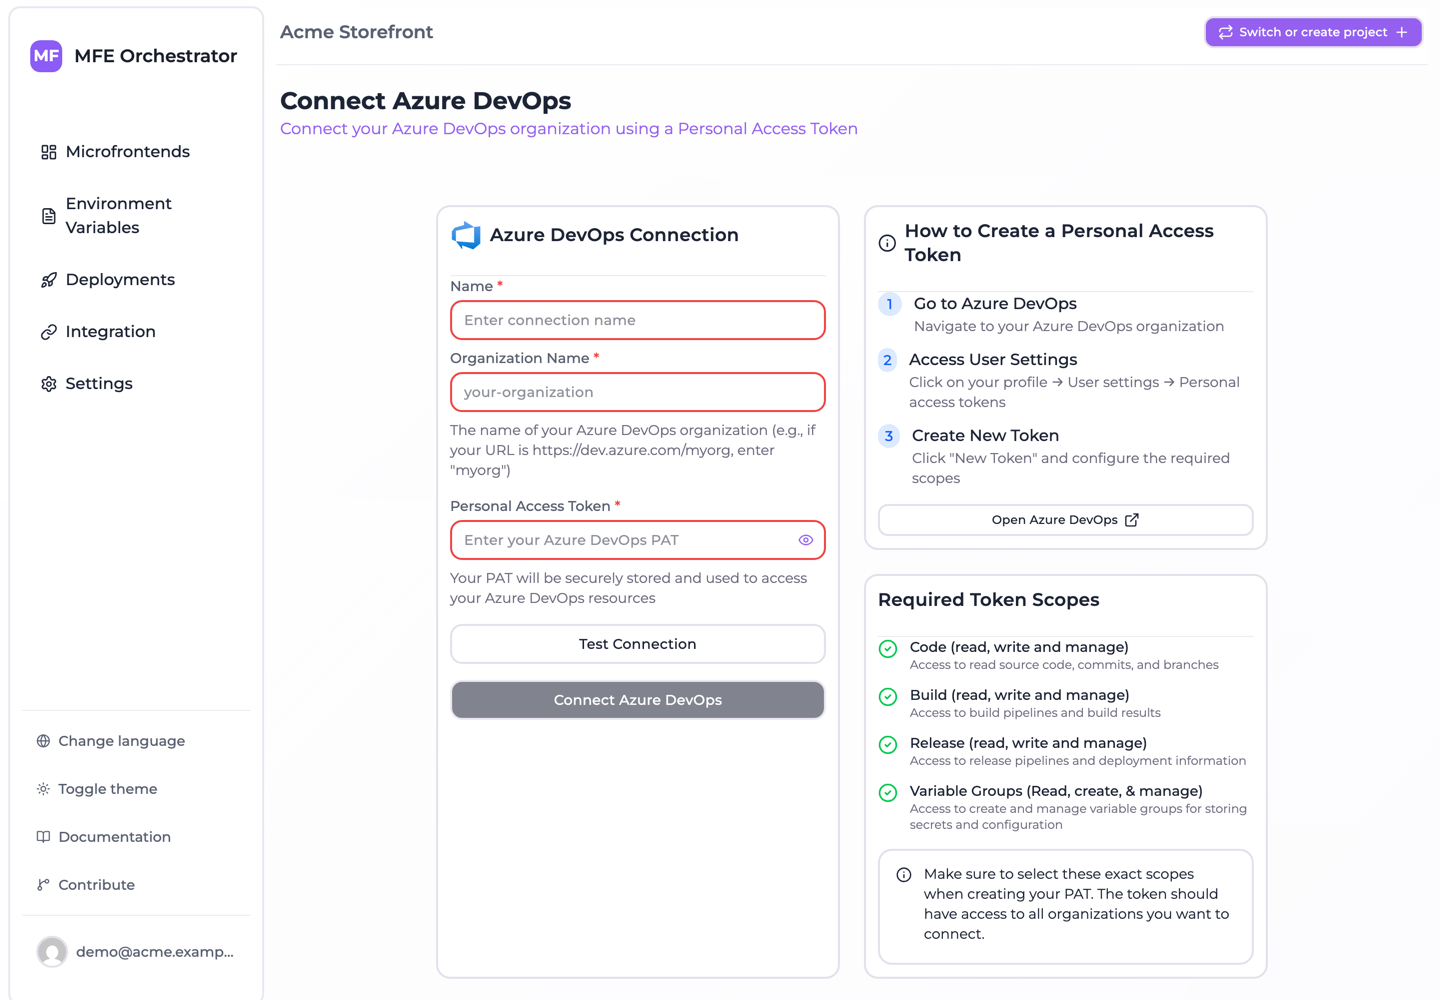
The connection screen lists the same four next to the form. :::
2.4 Generate the Token
- After selecting all required scopes, click Create
- Important: A dialog will appear with your token
- Copy the token immediately and save it securely, you won't be able to see this token again!
Step 3: Configure Connection in MFE Orchestrator
Now that you have your PAT, return to MFE Orchestrator to complete the connection.
3.1 Fill in Connection Details
In the Add Repository dialog, enter the following information:
-
Name: Enter a descriptive name for this connection
- Example:
"My Azure DevOps"or"Company Name DevOps" - This helps you identify the connection if you have multiple repository sources
- Example:
-
Organization Name: Enter your Azure DevOps organization name
- This is the part after
https://dev.azure.com/in your URL - Example: If your URL is
https://dev.azure.com/my-company, entermy-company
- This is the part after
-
Personal Access Token: Paste the PAT you created in Step 2
- Copy and paste the full token
- Make sure there are no extra spaces
3.2 Test the Connection
Before saving, verify that everything is configured correctly clicking on Test Connection button
:::tip Connection Test Success If the test is successful, you'll see a green checkmark and a success message. If it fails, double-check your organization name and PAT. :::
3.3 Select the Project
The test does more than validate the token: it returns the projects in the organization, and a Select project dropdown appears under the green checkmark listing them. Pick the Azure DevOps project new microfrontend repositories should be created in.
This step is not optional. The field is required and Connect Azure Dev Ops stays disabled until
the test has succeeded, so the form cannot be submitted without a selection. The project is also what
MFE Orchestrator needs in order to create the MFE_ORCHESTRATOR_SECRETS variable group holding the
deploy key — see
Deploy with Azure Pipelines.
3.4 Save the Connection
- With a project selected, click Connect Azure Dev Ops
- Your Azure DevOps connection is now active!
Troubleshooting
Connection Test Fails
If the connection test fails, check the following:
- Invalid Organization Name: Verify that the organization name matches exactly what appears in your Azure DevOps URL
- Insufficient Permissions: Ensure you selected all four required scopes — Code, Build and Release with "Read, write & manage", and Variable Groups with "Read, create, & manage"
- Expired Token: Check if your PAT has expired and create a new one if needed
- Network Issues: Verify that you have internet connectivity and can access Azure DevOps
Token Permissions Error
If you see a permissions error after connecting:
- Go back to Azure DevOps - Personal Access Tokens
- Find your MFE Orchestrator token
- Click Edit or Revoke and create a new token
- Ensure all required scopes are selected
- Update the token in MFE Orchestrator settings
Cannot See My Project
If your project doesn't appear in the dropdown:
- Verify that you have access to the project in Azure DevOps
- Make sure the PAT has access to "All accessible organizations" or the specific organization
- Check that the project is not archived or deleted
Security Best Practices
:::warning Token Security Follow these best practices to keep your account secure: :::
- Never share your Personal Access Token with anyone
- Use specific scopes - only grant the permissions that are needed
- Set expiration dates - tokens should expire after 90 days or less
- Rotate tokens regularly - create new tokens periodically
- Revoke immediately if compromised - if you suspect a token has been exposed, revoke it right away and create a new one
- Use separate tokens for different services - don't reuse the same PAT across multiple integrations
Need Help?
If you encounter any issues or need assistance:
- Check the Azure DevOps documentation
- Review the PAT documentation
- Contact MFE Orchestrator support